A Simple Rustic Garden DIY (With the Sweetest Little Seed Packets)
Well… this project didn’t exactly start smoothly. Technology had other plans that night, and it took a bit to even get going. But honestly? Sometimes those are the nights where the creativity flows the best. And this one turned into something I absolutely love.
If you enjoy rustic, farmhouse-style decor with a little story behind it, this is such a sweet and simple project you can recreate using inexpensive supplies.
What We’re Making
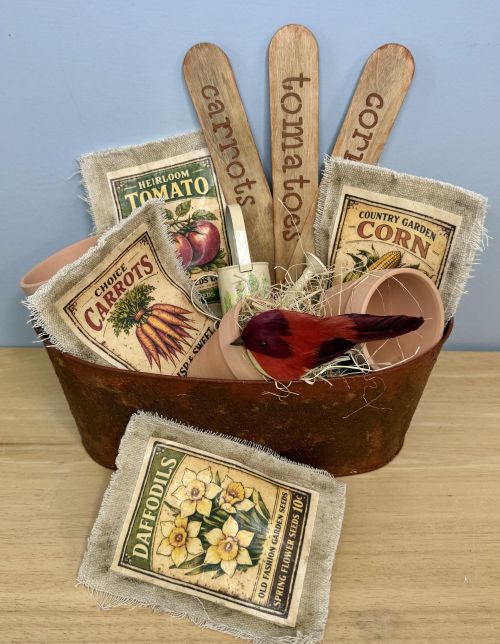
This little setup is a rustic garden tub vignette that includes:
- A weathered metal-style container
- Handmade “seed packet” sachets
- Simple garden markers
- A cozy, styled display you can change out for seasons
It feels like something you’d find tucked away in an old potting shed… and that’s exactly the look we’re going for.
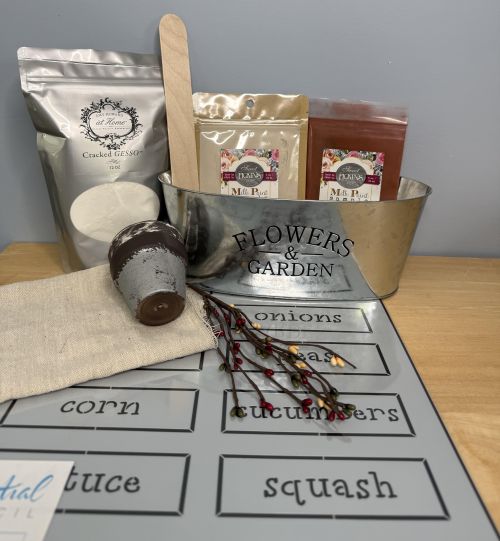
Supplies Used
You can easily swap things out, but here’s what I used:
- Small metal container (Dollar Tree find)
- Bonding primer (to help paint stick)
- Crack gesso + milk paint (for that aged, chippy look)
- Drop cloth fabric
- Printed designs (for seed packets)
- Mod Podge (matte)
- Rice (for filling packets)
- Popsicle sticks
- Acrylic paint + stencil (for plant markers)
- Moss + small decorative accents
Step 1: Prep the Container
Because the container has a slick surface, I added a bonding layer first. This helps the paint actually stick and not peel off later. Then I went in with:
- Crack gesso (for texture)
- Followed by milk paint
This combination gives that old, worn, slightly chipped look that makes it feel like it’s been around for years.
Step 2: Create the Seed Packets
This might be my favorite part. Using drop cloth fabric:
- Cut into rectangles
- Glue three sides to form a pouch
- Add your printed design using Mod Podge
- Let it dry
Then fill lightly with rice so they feel like real seed packets (but don’t overfill). After sealing the top, I gently frayed the edges to give it that soft, worn, farmhouse feel.
For extra character, I added a little brown wax to “dirty” them up just a bit.
Step 3: Make the Garden Markers
These are simple but add so much charm.
- Use popsicle sticks
- Add words like tomato, corn, carrots using a stencil
- Lightly distress with wax or glaze
They don’t need to be perfect—that’s part of what makes them feel real.
Step 4: Style Your Display
Now comes the fun part. Fill your container with:
- Brown paper (so it’s removable and interchangeable)
- Moss
- Seed packets
- Markers
- A small decorative piece (like a bird or watering can)
Layer everything until it feels balanced and cozy.
The Finished Look
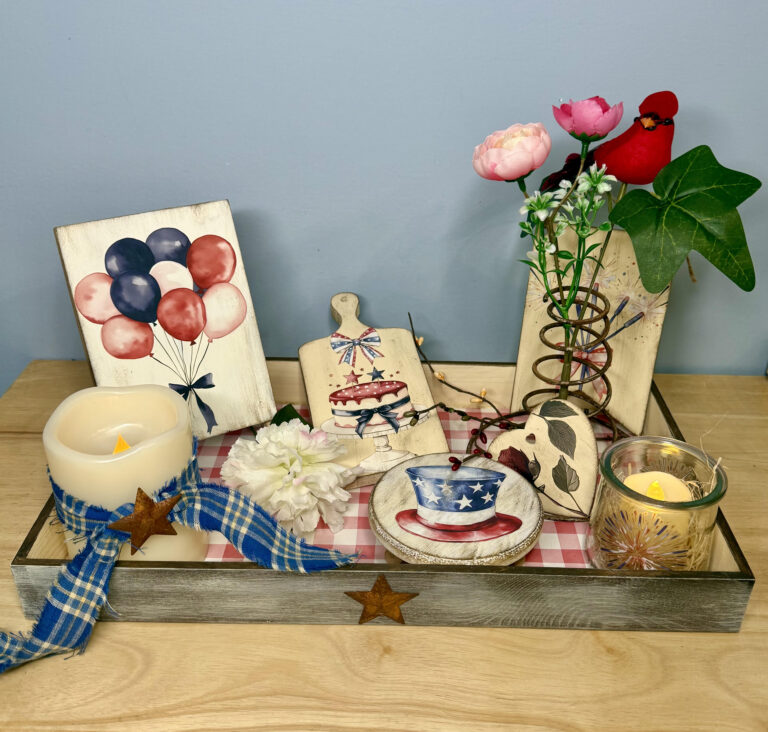
What I love most about this piece is that it looks like it has a story. Like something that’s been used, loved, and kept around. You can almost imagine it sitting in a garden shed, tucked beside a window. And the best part? You can easily change this out for different seasons—patriotic, fall, Christmas… anything.
A Little Encouragement
This project reminded me of something simple but important:
We were created to create.
“For we are His workmanship, created in Christ Jesus for good works…” — Ephesians 2:10
You don’t need perfect conditions. You don’t need perfect supplies. Just start.
If you try this, I’d love to know what you make your version look like. And don’t be afraid to change it up—different fabrics, different containers, different colors. That’s where your creativity comes in!