Rustic Patriotic Tray DIY (Using Transfers + Mini Decor Pieces)
Sometimes the best projects aren’t just one piece… they’re a whole little scene.
That’s exactly what this turned into—a simple wooden tray transformed into a full patriotic display, layered with textures, colors, and meaningful details. And the best part? It all started with a single gingham transfer.
Supplies Used
- Wooden tray
- Buttermilk paint (for base)
- Dark walnut stain
- Gingham transfer (red/white)
- Patriotic transfer sets (fireworks, cake, banner, etc.)
- Small wood blanks (cutting board, tag, shapes)
- Sandpaper or sanding sponge
- Stain sponge or cloth
- Rubbing alcohol (for glass prep)
- Small jar (for candle holder)
- Twine or jute
- Fabric strip (for accent)
- Decorative elements (bed spring, berries, greenery – optional)
- Burnishing tool or transfer tool
Building the Base (That Gingham Moment)
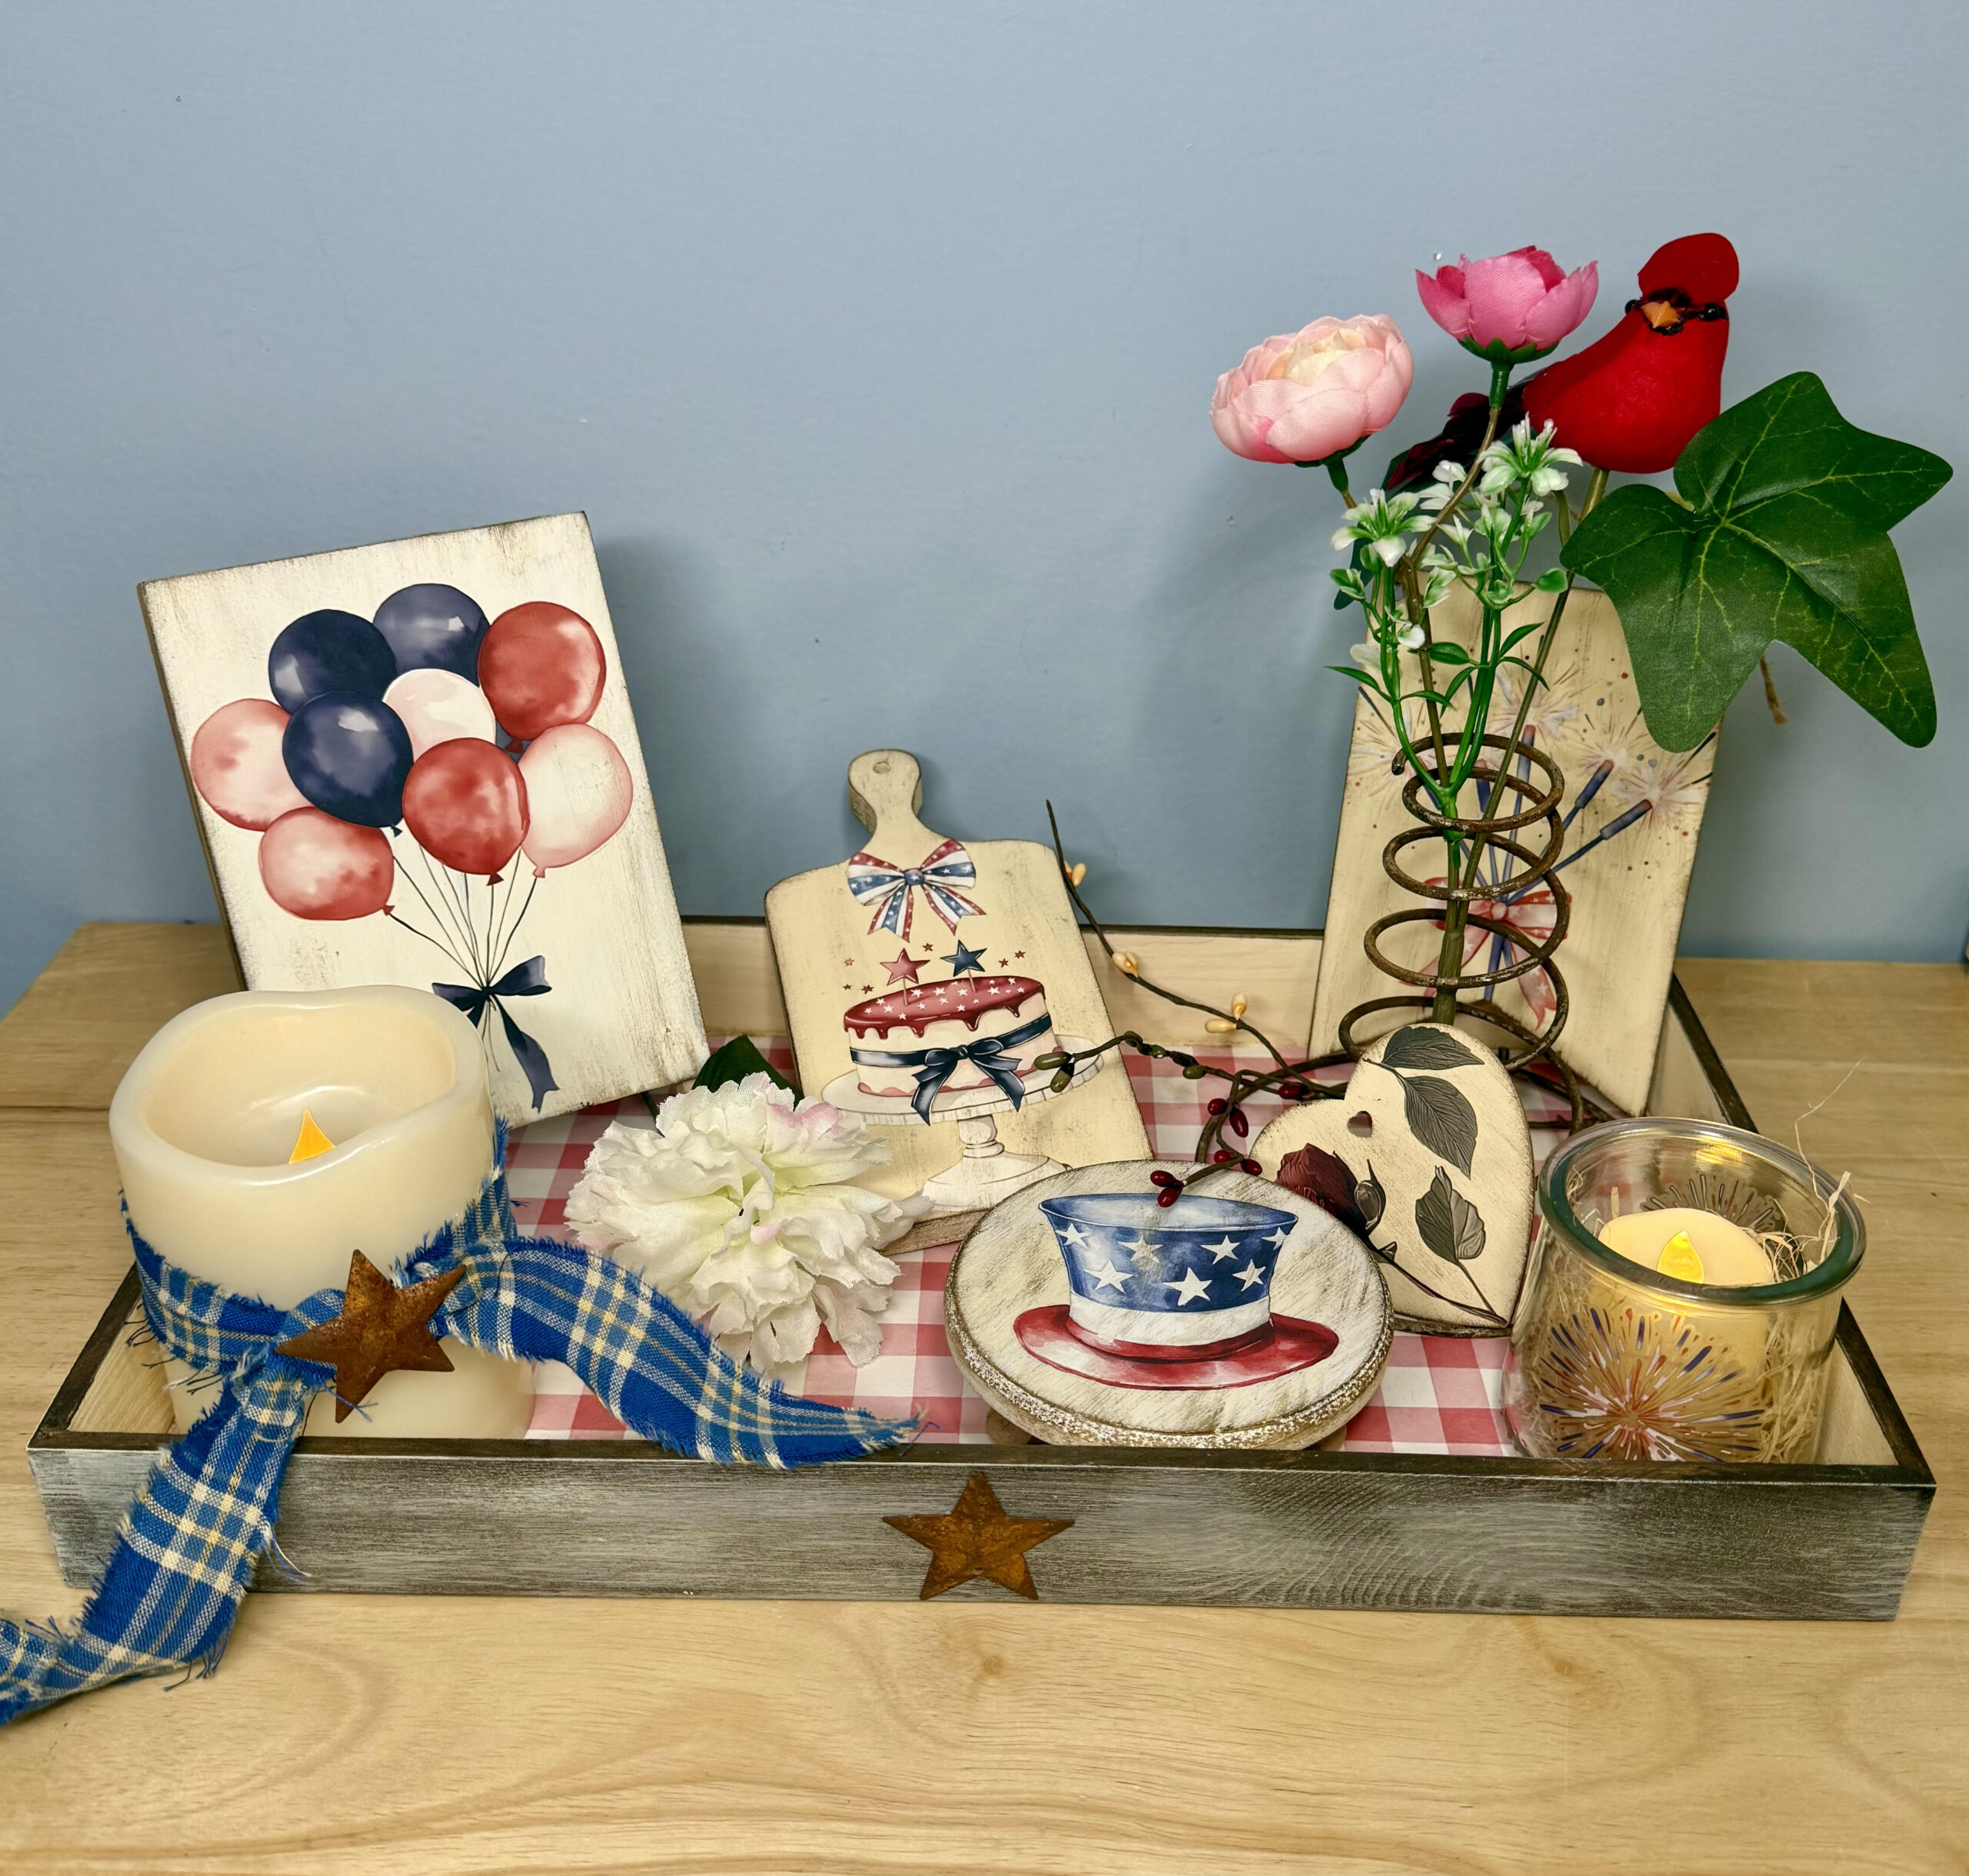
The tray itself was already prepped ahead of time—painted inside with a soft buttermilk color and stained around the edges and back with a dark walnut finish. Then came the star of the base: a red and white gingham transfer.
Getting a large transfer into a tray isn’t the easiest thing—it takes patience and a little trial and error—but once it’s in place, it completely transforms the piece. It instantly feels like a picnic tablecloth, which sets the tone for everything else.
Layering the Story (This is Where It Comes Together)
Instead of stopping with the tray, this project builds outward using smaller pieces. Each item adds something to the story:
- Fireworks for celebration
- A cake for gathering
- A banner for festivity
- A heart for family
- A little jar with fireworks for glow and warmth
Individually, they’re simple. Together, they feel like a moment. It’s like setting the scene for a backyard celebration.
Why Transfers Work So Well Here
This entire project leans heavily on transfers—and for good reason. They make it possible to create detailed designs without needing advanced painting skills. You can mix and match elements, scale them to different surfaces, and create something that feels cohesive without being complicated.
But there’s one thing that matters most when using transfers: Your surface has to be completely dry. Not just “feels dry”—actually dry. Paint, stain, anything underneath needs time to cure so your transfer adheres properly. That one step makes all the difference.
Adding That Aged, Rustic Look
Once all the pieces were decorated, everything was softened just a bit with stain around the edges. Nothing heavy, just enough to take away that “brand new” look. A little distressing here and there helps everything feel like it belongs together, even though each piece started separately. And that’s what gives it that collected, lived-in feel.
Styling the Tray
This is where it really comes to life. Everything is placed inside the tray like a small display:
- The banner tucked into a spring base
- The cake and fireworks layered in front
- The jar with a candle for height and glow
- A bit of fabric tied around the candle for softness
You could even add burlap, greenery, or seasonal accents depending on where you place it.
A Simple Idea That Changes Everything
You don’t have to create one big statement piece to make something beautiful. Sometimes it’s about smaller pieces… working together. This project is a perfect example of how you can take:
- One tray
- A handful of transfers
- A few wood blanks
…and turn them into something that feels thoughtful, warm, and full of meaning.