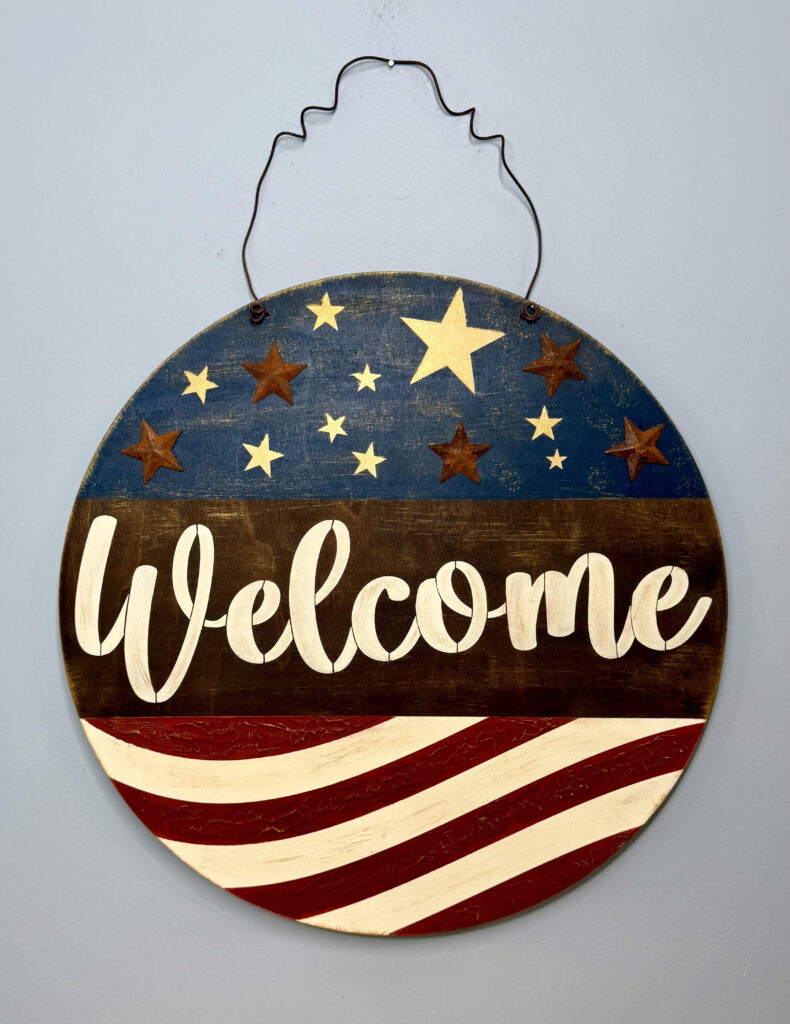
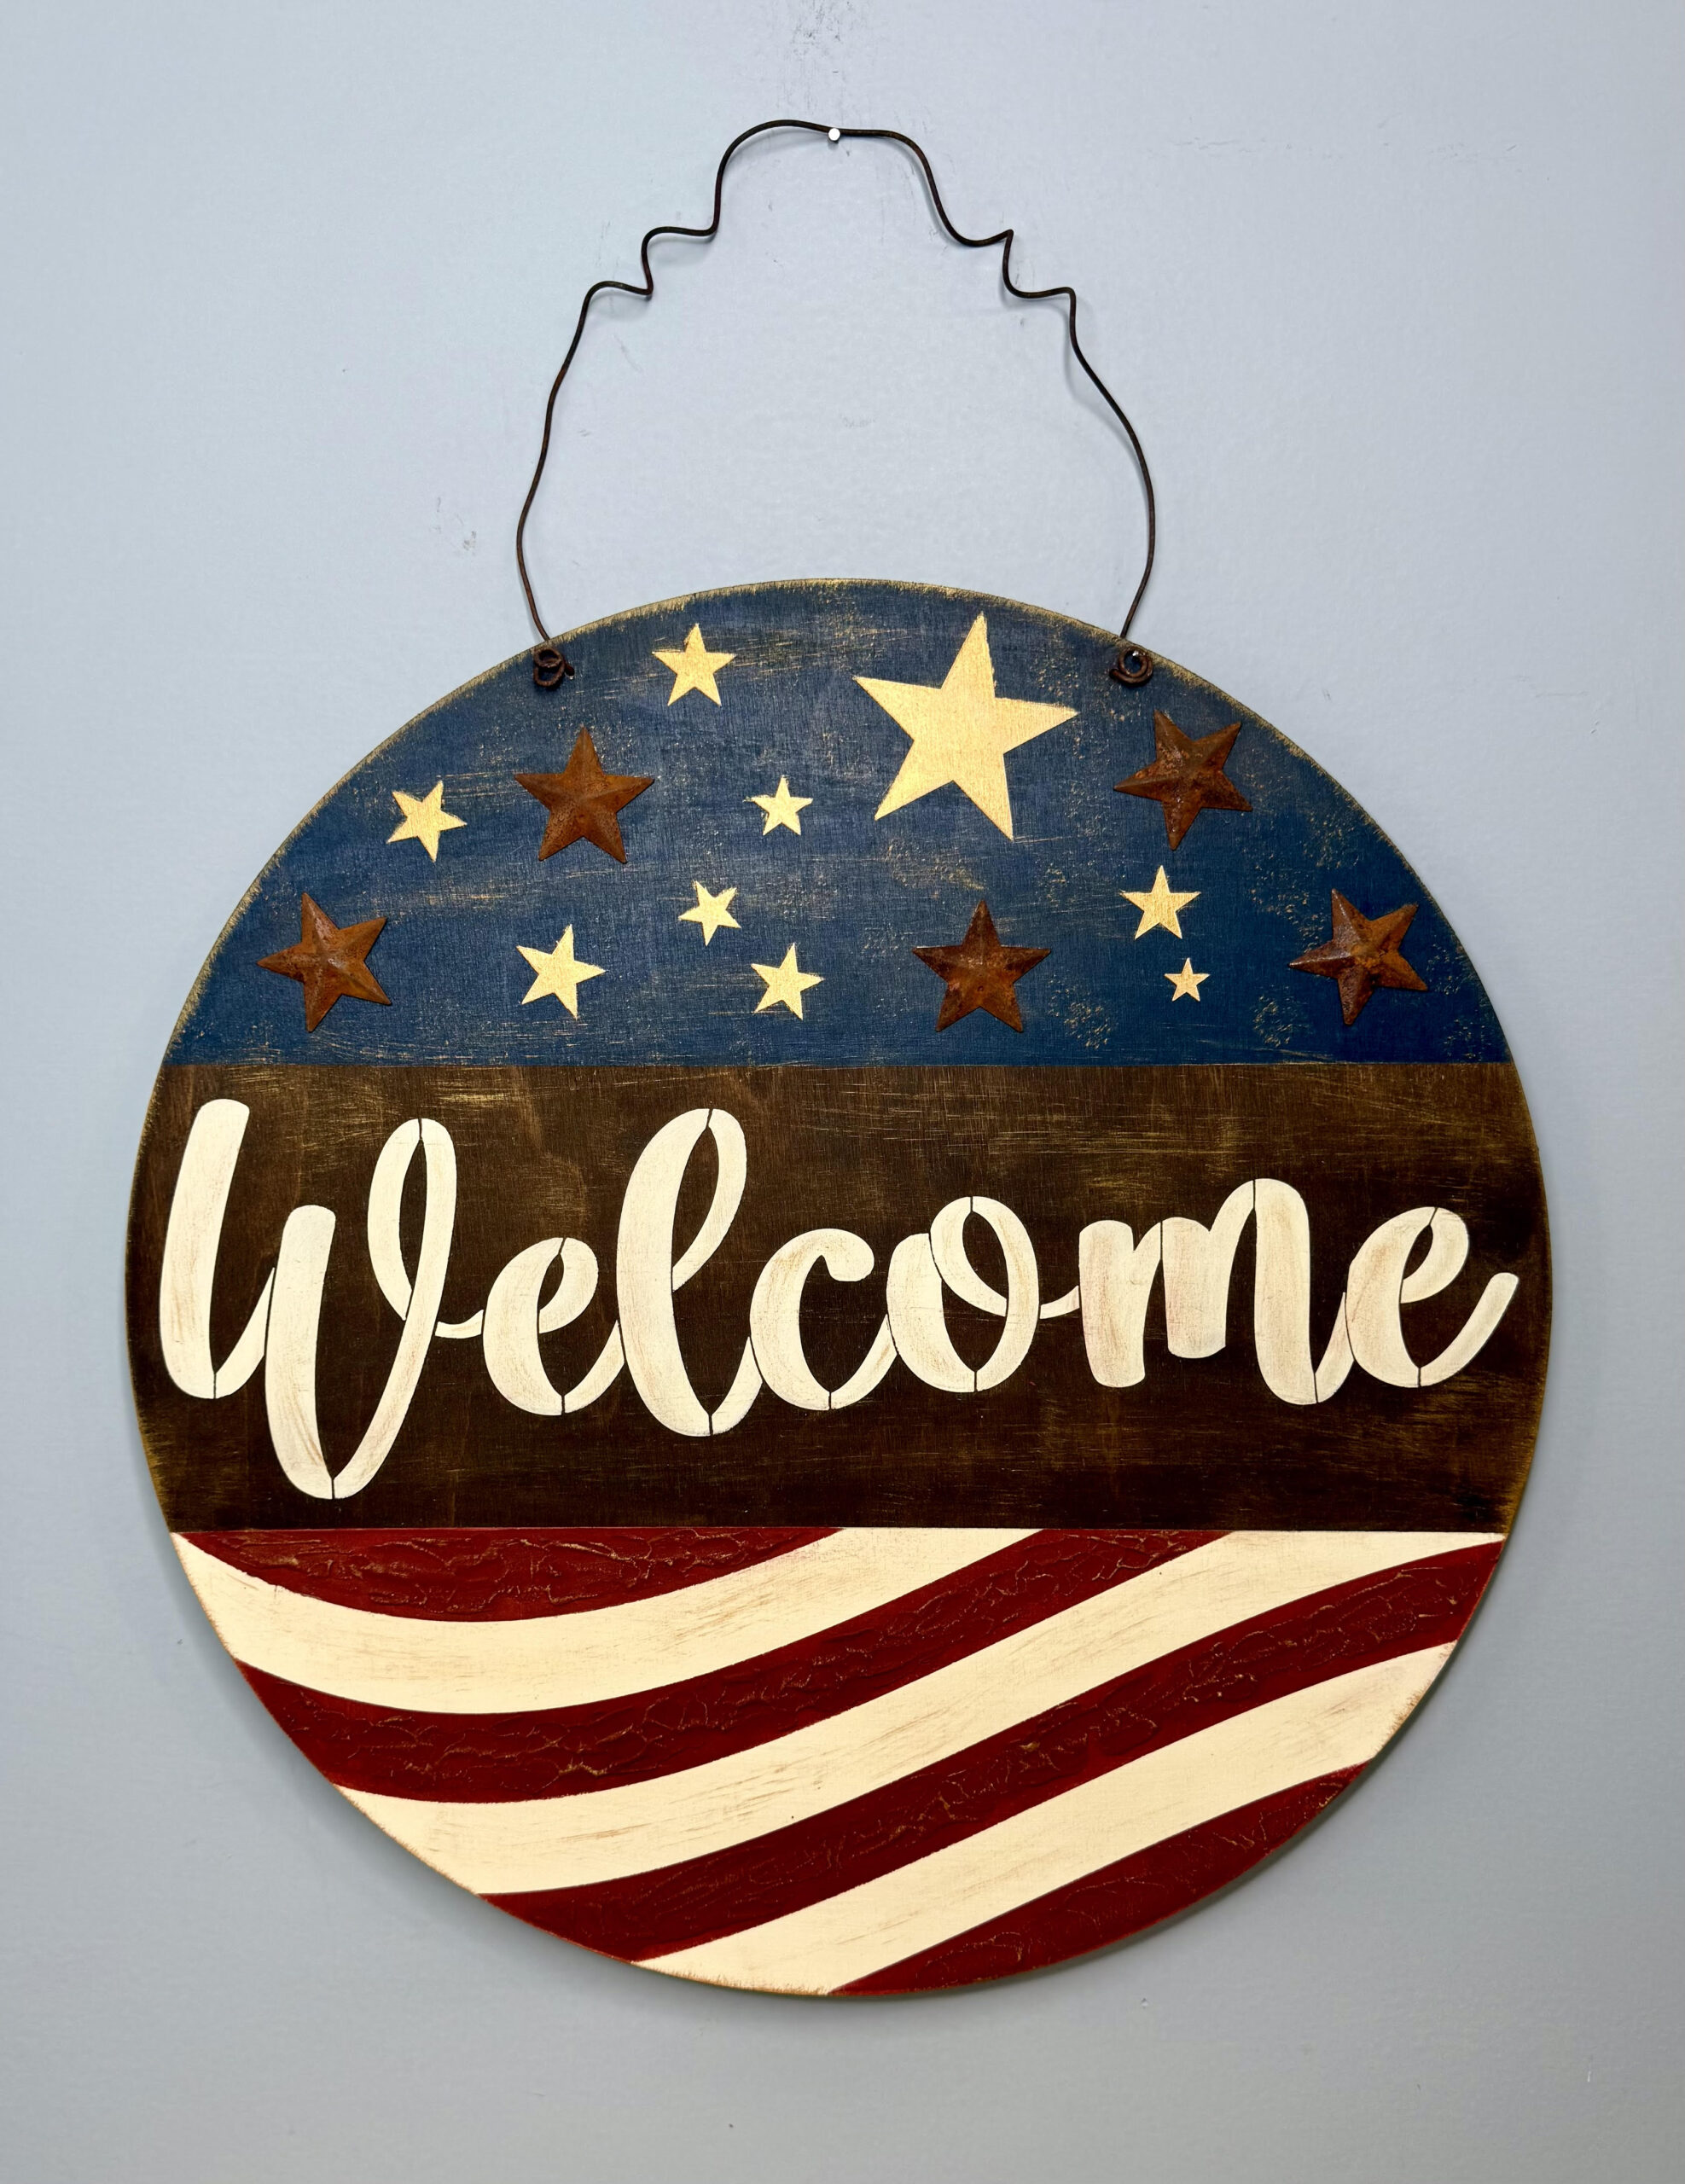
How to Make a Rustic American Flag Door Hanger (With Texture + Stencils)
If you love that worn, vintage, slightly imperfect look, this project is going to be one of your favorites. This rustic American flag door hanger is all about layering, texture, and letting the piece evolve as you go—instead of trying to make everything perfectly straight and even.
Supplies Needed
- 16″ wood round (1/4″ thick preferred for door hanger)
- Pencil (for layout lines)
- Ruler (to measure stripe/star section)
- Sandpaper (for distressing + smoothing)
- Minwax Dark Walnut stain
- Minwax Marine Blue stain
- Stain sponge
Paint: - Light Buttermilk (cream stripes + lettering)
- Heritage Brick (red stripes)
- Venetian Gold (accents + aging)
- Optional: Rich Espresso (for grungy/distressed depth)
Tools: - 1/2″ flat stencil brush
- 5/8″ flat stencil brush
- (used 7/8″ for larger areas)
- Chip brush (for blending/streaking)
- Coffee filters (for offloading paint)
- Paper towels / wipes (cleaning + blending)
From Essential Stencil:
- American Flag stencil (stars section)
- “Welcome” stencil (main word)
Starting with the Base
This piece begins with a 16-inch wood round. The top portion is stained in a deep dark walnut, while the bottom is painted in a soft, creamy tone. That contrast gives you a strong foundation for the flag design while still keeping everything warm and muted. A simple pencil line helps divide the sections, but it doesn’t have to be exact—this is a relaxed, rustic style.
Creating the Blue Field
Instead of using paint, a marine blue stain is layered over the dark wood. This gives you a softer, more dimensional look where the brown subtly shows through—perfect for that aged, Americana feel. If you want it darker, you can add another coat… but even one layer creates a really beautiful, weathered effect.
Adding Texture (The Fun Part)
This is where the project really comes to life. A simple mixture of acrylic paint and baking soda creates a thick paste that can be applied with a palette knife. Spread it lightly across the red stripes to mimic movement, dimension, and a weathered surface. It gives the flag a subtle raised texture that makes it feel more handmade and unique.
Finishing Touches
To tie everything together, soft gold accents are added for warmth, and a little distressing blends the colors and the bright areas are toned down slightly.