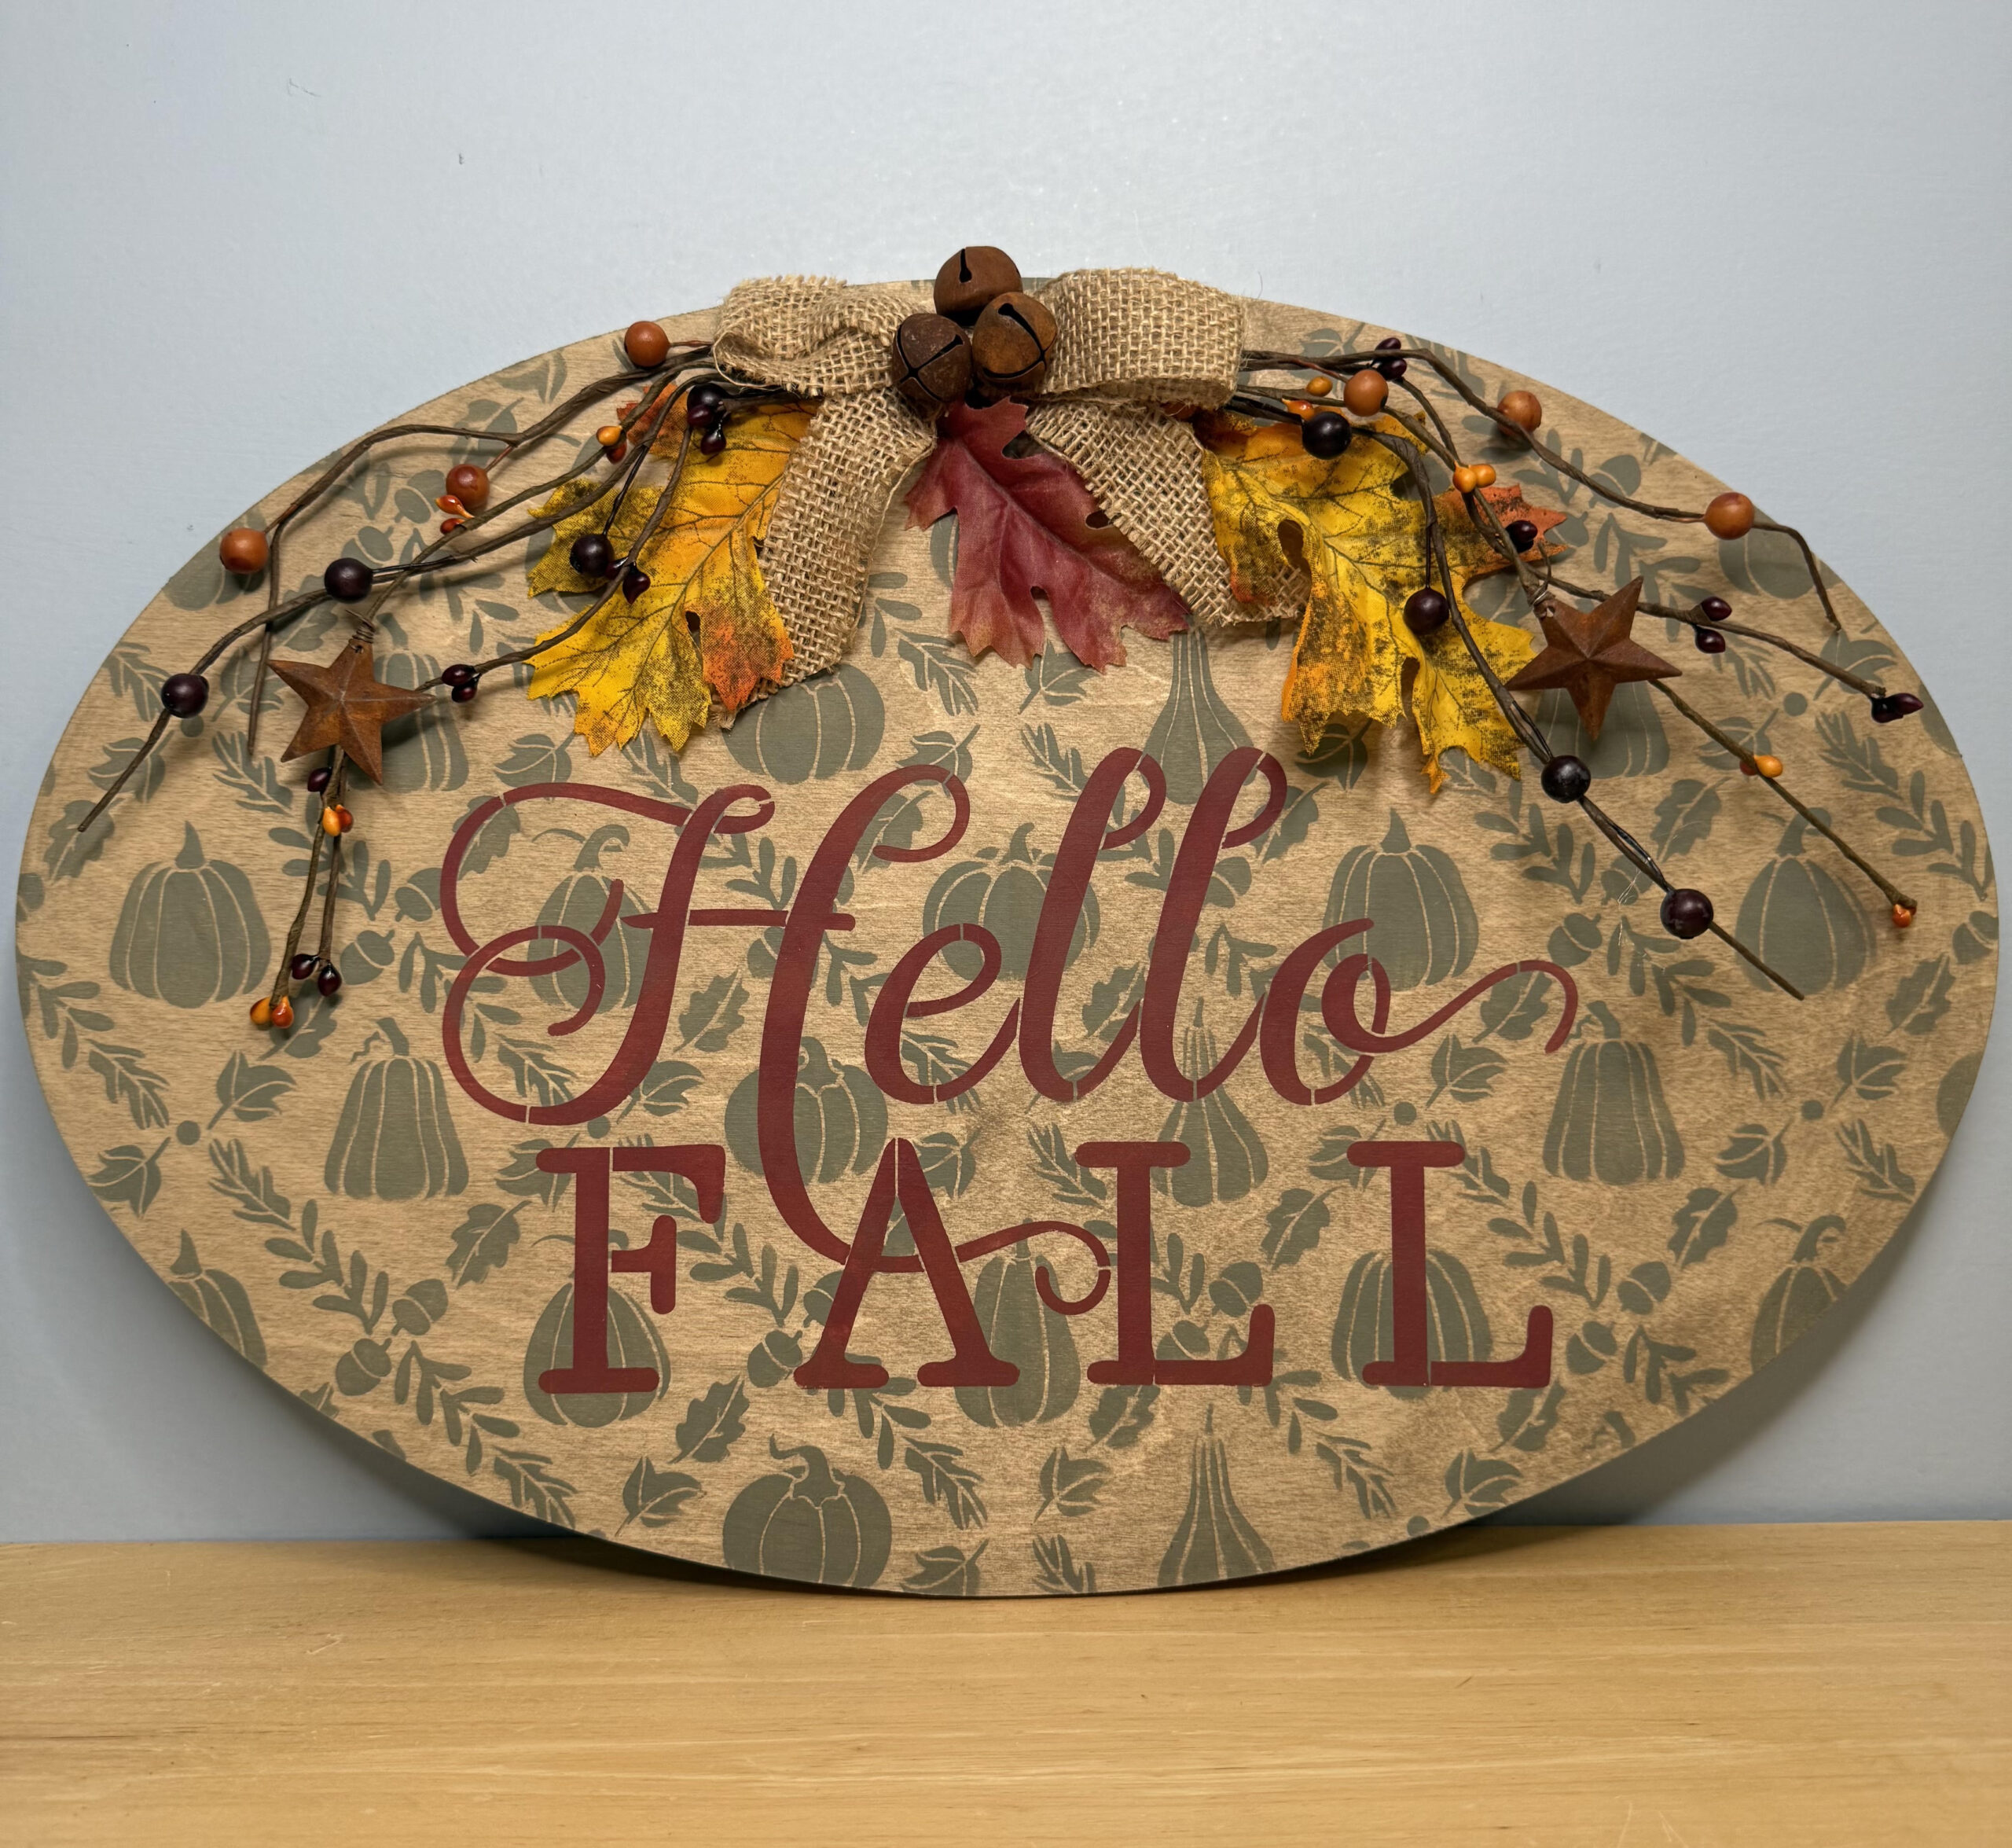
DIY Rustic Hello Fall Sign with a Reverse Stain Technique
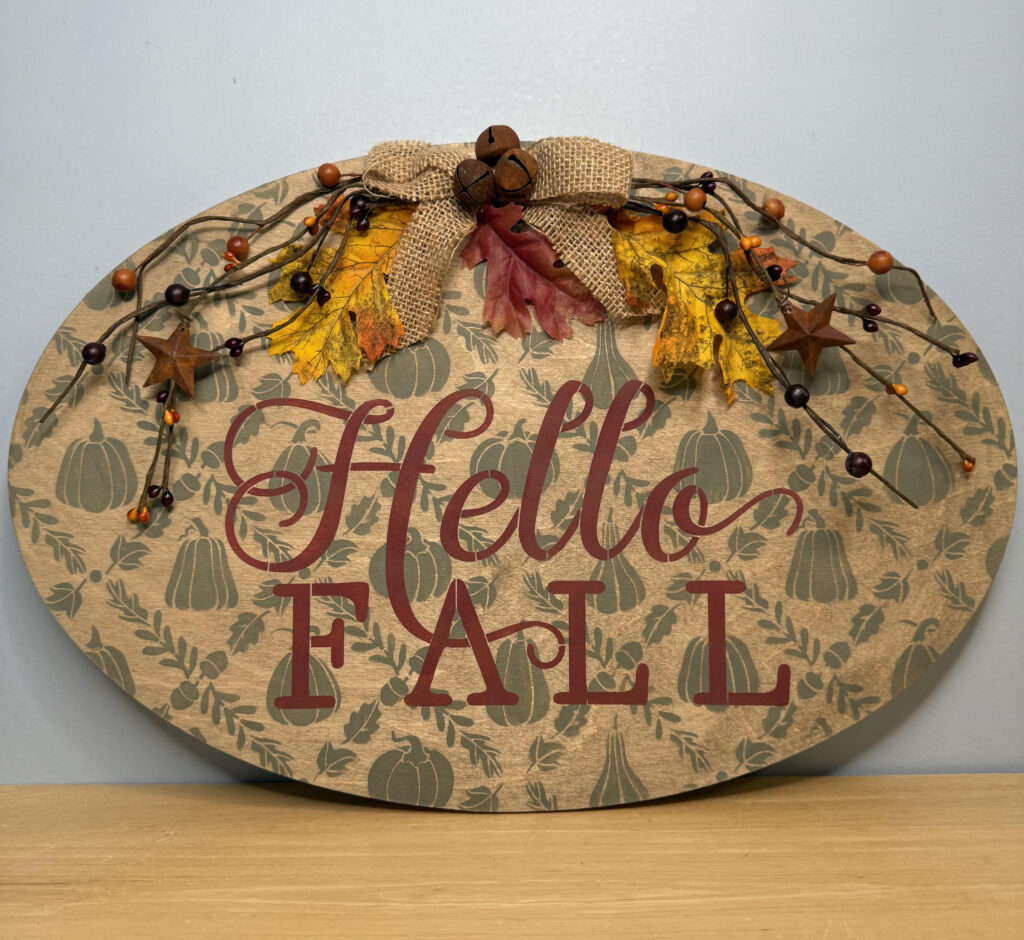
I’m ready for all the warm colors and cozy projects that come with fall, and this Hello Fall sign was such a fun one to create. For this project, I combined pieces from two different Essential Stencil designs and tried a reverse-stain technique that gives the finished sign a wonderfully aged, primitive look.
Supplies Used
Save with Code WK21 at Essential Stencil and Craft Dealz
- CraftDeals 12″ x 18″ Oval Wood Surface
- Essential Stencil Pumpkin Harvest Pattern
- Essential Stencil Hello Fall Fox Stencil
- Dixie Belle Thicket Chalk Paint
- Minwax Weathered Oak Water-Based Stain
- DecoArt Heritage Brick
- DecoArt Deep Burgundy
- Stencil Brushes
- Scruffy Brush
- Sanding Sponge
- Stain Sponge
- Clorox Wipes
- Fall Pip Berry/Floral Swag
- Oak Leaves
- Homespun Fabric Bow
- Rusty Bells
- Hot Glue
- Permanent Craft Glue
- Eye Hooks
- Polycrylic or Spray Sealer
I’m working on a 12×18 oval wood surface from CraftDeals. For the background, I chose the Pumpkin Harvest pattern, and then I borrowed just the words from the Hello Fall Fox stencil. I love showing different ways to use stencils because you’re never limited to the design shown on the package. You can pull elements from several sets and create something completely your own.
Creating a Repeating Pumpkin Background
The Pumpkin Harvest design is a repeating stencil, which means you can continue the pattern across a surface that’s larger than the stencil itself.
I started by finding the center of my oval and making a very light pencil mark. I also marked the center of the stencil so I could line everything up. Once I finished the first section, I simply moved the stencil over, matched the repeating portions of the design, and continued across the wood.
I used Dixie Belle Thicket for the entire pumpkin pattern. I wasn’t looking for perfectly solid coverage because I knew I wanted the finished piece to feel rustic. Some pumpkins can be a little darker or lighter than others—that variation just adds character.
When stenciling, I always work with a fairly dry brush. It’s much easier to go back and add a second or third coat than it is to remove paint that has bled underneath your stencil. Less really is more!
Trying the Reverse Stain Technique
Here’s where the fun happens.
Instead of staining my wood before stenciling, I painted the pumpkin pattern first. Once the paint was completely dry and the surface had been lightly sanded, I applied Minwax Weathered Oak Water-Based Stain right over the painted design.
The stain changes the whole look of the piece. It tones down the green, adds warmth to the bare wood, and makes the entire background feel softer and more aged.
You also have quite a bit of control over the finished color. Adding more stain makes the background darker, while wiping some away lightens it. I like playing with it until I get the look I want rather than worrying about making every area exactly the same.
Adding the “Hello Fall” Lettering
For the words, I borrowed Hello Fall from the Hello Fall Fox stencil. I didn’t need the fox or the acorns for this project—I just wanted that pretty lettering.
I started with Heritage Brick and then lightly added a little Deep Burgundy here and there. The color difference is subtle, but that’s what I wanted. Those slightly different tones add dimension without making the lettering look overly complicated.
Adding the Primitive Fall Details
To finish the sign, I kept the embellishments simple and natural. I used part of a fall swag with pip berries, a homespun-style bow, oak leaves, and three little rusty bells.
I played around with adding extra twigs and leaves, but ultimately I liked the simpler arrangement best. That’s usually my style anyway—a little rustic, a little primitive, and not too fussy.
Once everything is completely finished, I’ll seal the sign with Polycrylic or a spray sealer and add eye hooks so it’s ready to hang. And because I love getting more than one season out of my wood surfaces, I’m planning a Christmas design for the reverse side!
I love how this one turned out. The pumpkin pattern is there without being too bold, and the Weathered Oak over the green gives the whole piece that aged look I love. The warm red lettering and simple fall embellishments finish it off without covering up that pretty background.
And now I already have another project waiting for me on the back—Christmas!