DIY Primitive Snowman Decor for Winter
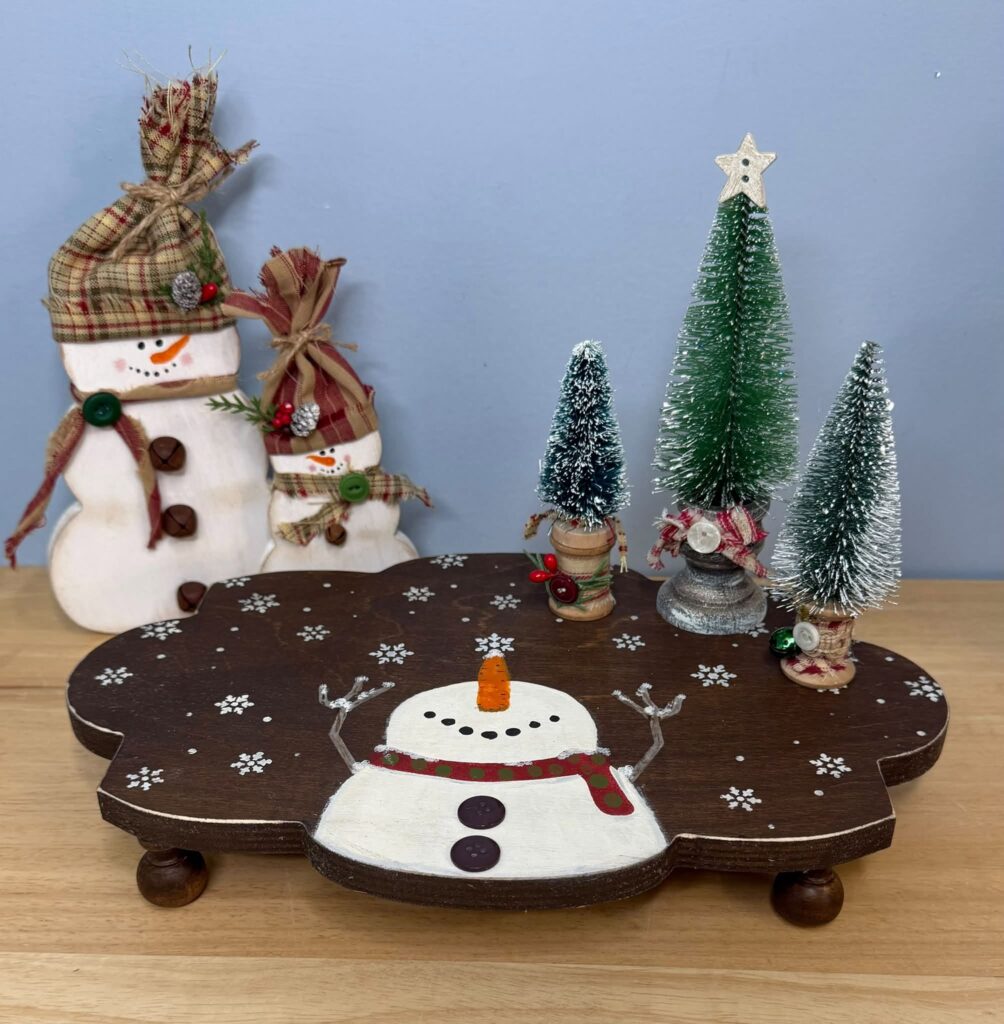
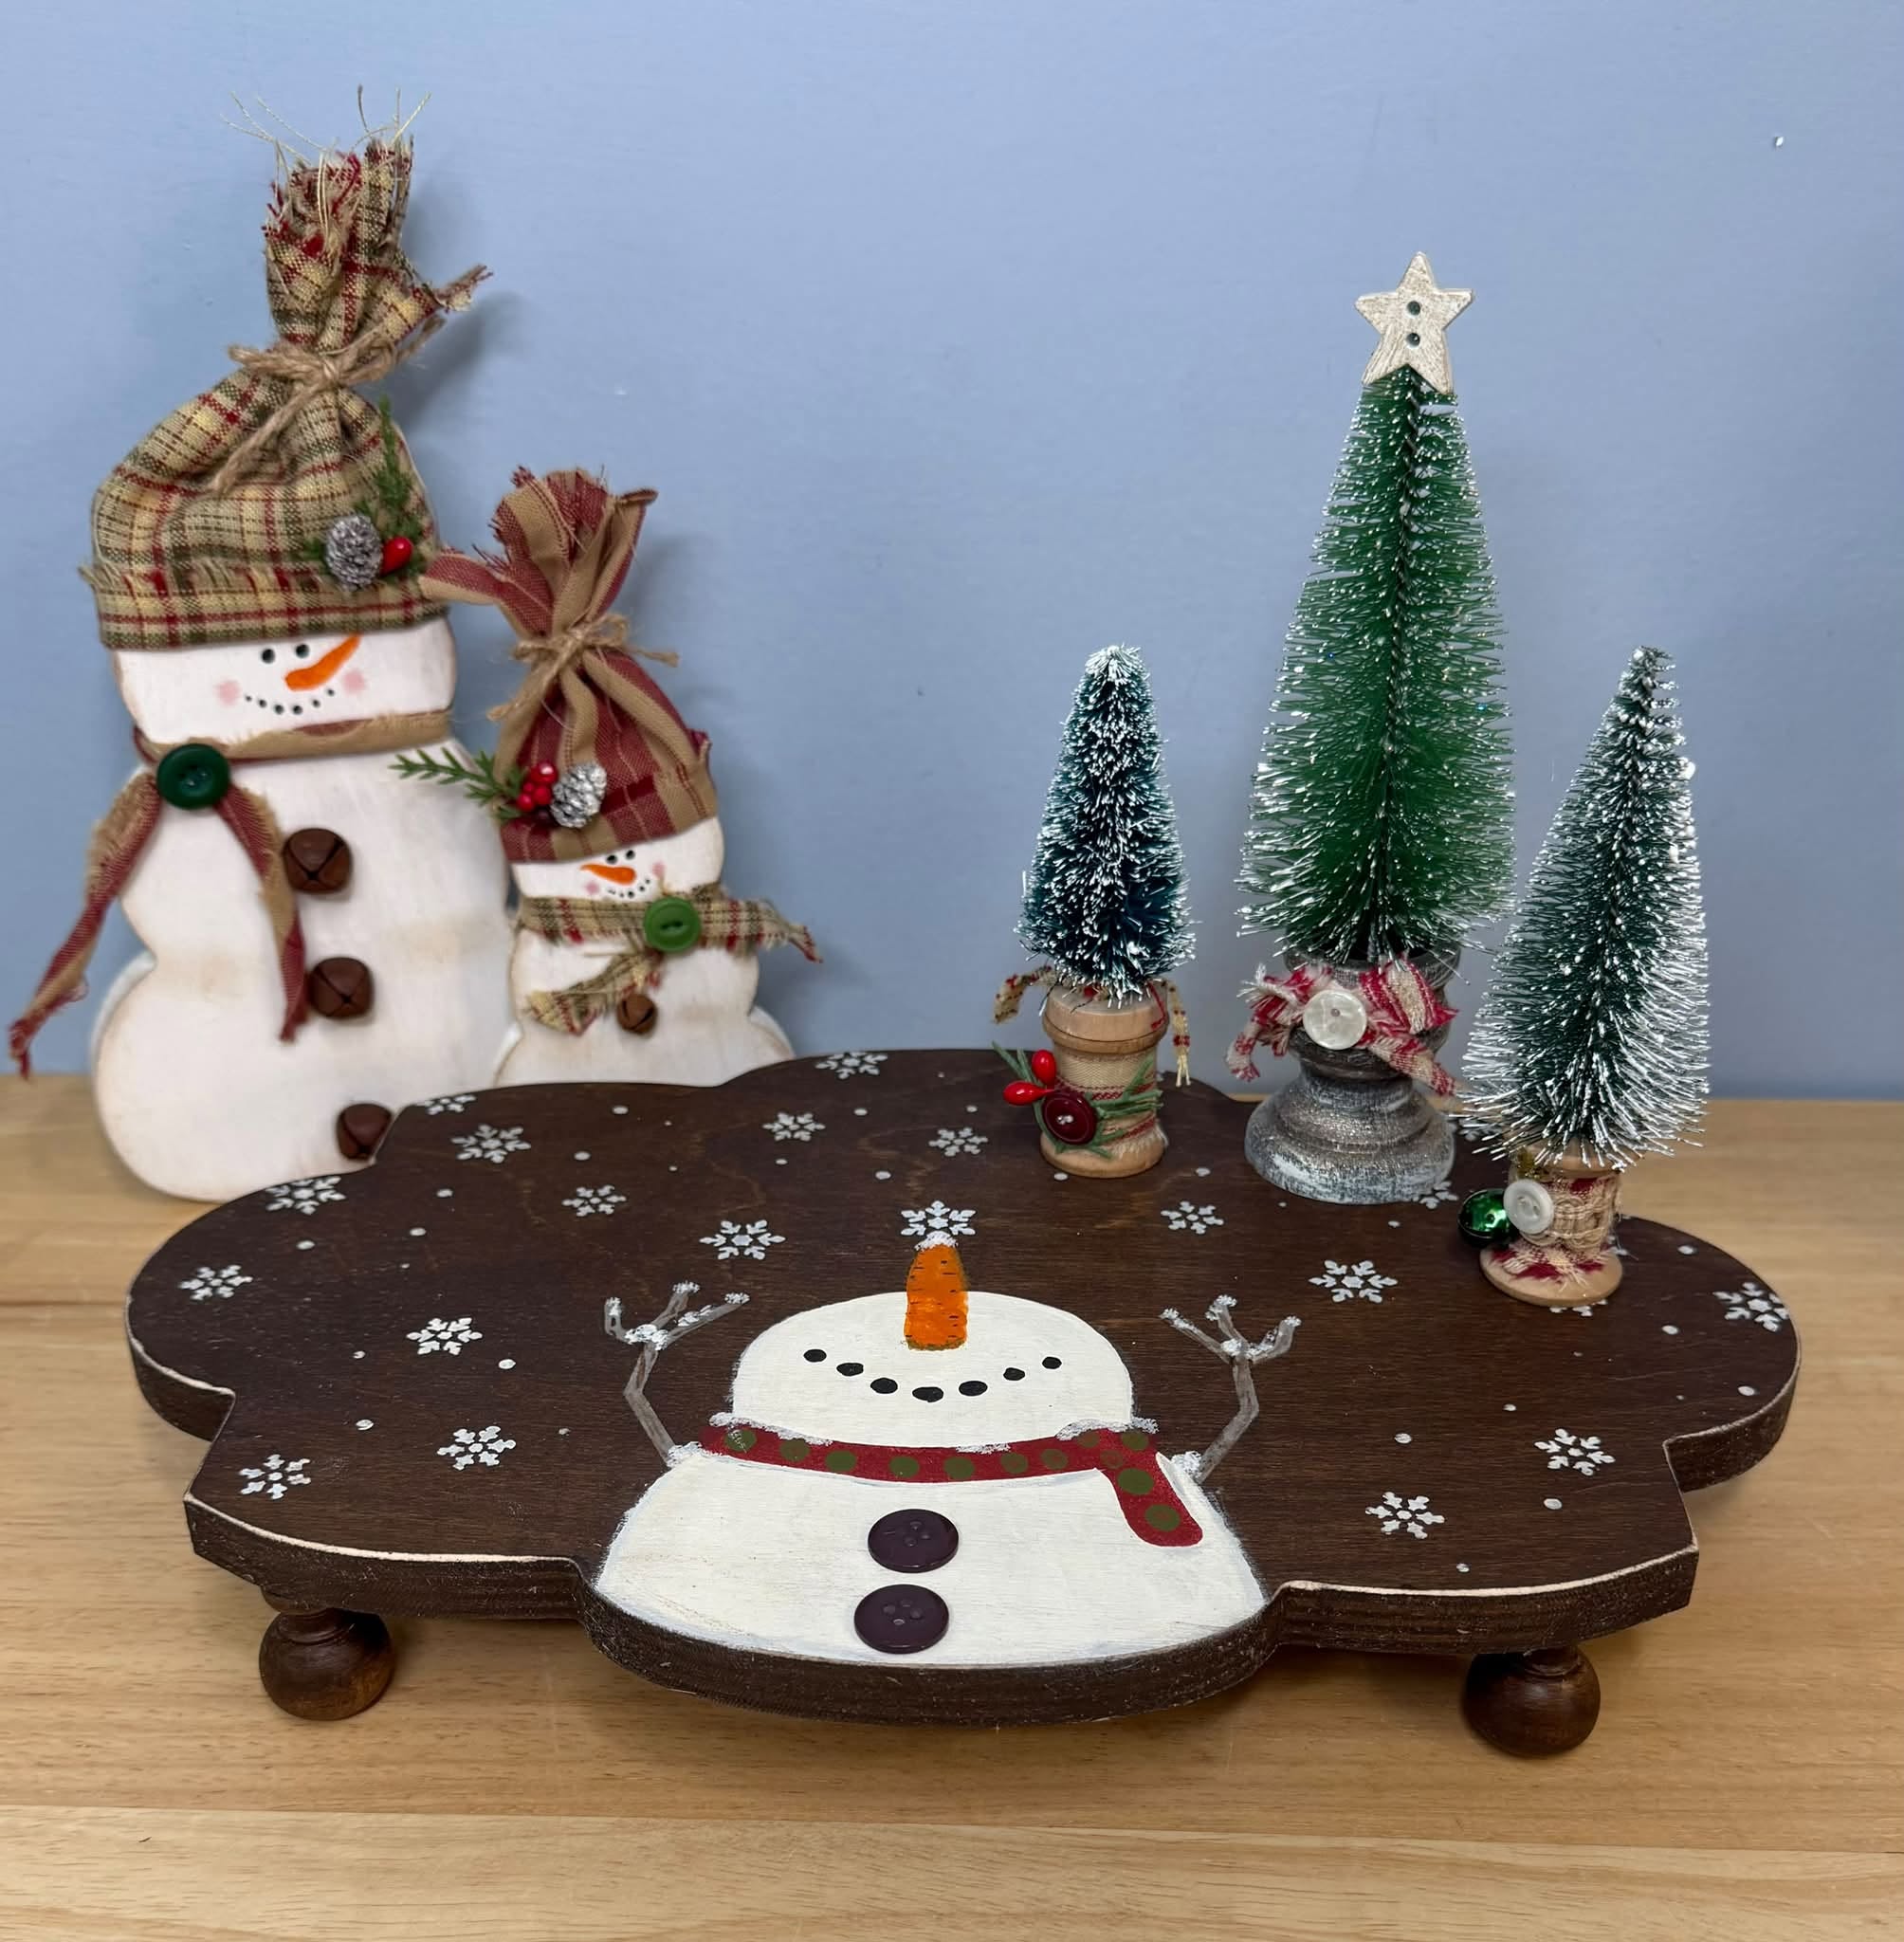
I love snowmen because they aren’t just for Christmas. You can bring them out during the holidays and leave them sitting around your home throughout the winter. For this project, I decided to make three coordinating snowmen using simple wood cutouts from CraftDeals. One became a fun footed riser, and the other two became smaller snowmen that look so cute displayed alongside it.
I wanted these snowmen to have more of my favorite rustic, vintage farmhouse style, so I stayed away from a really crisp, bright white finish. For the larger snowman, I mixed Buttermilk and Warm White to create a creamy base and then layered brighter white over parts of it. The variation gives him more dimension and makes the finish feel a little older and more primitive.
Supplies Used
- CraftDeals Snowman Wood Cutouts
- CraftDeals Kathy Fine Footed Riser
- Essential Stencil White Christmas Stencil Set
- Minwax Dark Walnut Stain
- Waverly Wax
- DecoArt Buttermilk
- DecoArt Warm White
- DecoArt Spiced Pumpkin
- DecoArt Traditional Burnt Umber
- DecoArt Heritage Brick
- DecoArt Lush Green
- Black Acrylic Paint
- Stencil Brushes/Dome Brushes
- Sanding Sponge
- Stain Sponge
- Wood Glue
- Hot Glue
- Fabric Scraps
- Rustic Bells
- Greenery
- Small Pinecones
- Dotting Tools
Painting the Snowman
I used the White Christmas stencil set from Essential Stencil as the starting point for my larger snowman. Instead of simply stenciling the whole design, I used the stencil to help outline him and then filled in parts by hand. It’s a fun way to combine stenciling and hand painting without having to draw the entire snowman yourself.
Once his body was finished, I started adding all the details. Spiced Pumpkin gave him his carrot nose, Traditional Burnt Umber worked for the branch arms, and Heritage Brick gave his scarf a beautiful primitive red color. I added green polka dots to the scarf and darker paint to the eyes and details.
I also scattered snowflakes around him instead of carefully lining everything up. I actually like when some of the snowflakes run off the edge because it makes the pattern look more natural. A little extra “snow” on his nose, scarf, and arms helped finish him off.
Turning Him Into a Snowman Riser
The larger piece becomes even more fun when the little wooden feet are added underneath. I used wood glue for the permanent hold and a little hot glue to help hold everything in place while the wood glue dried.
Once he’s finished, there are so many ways you could use this little riser. Set a candle on top, add some greenery, use it in a winter display, or put Santa’s plate of cookies on it for Christmas Eve.
Two Little Primitive Snowmen
For the smaller snowmen, I wanted to go even more primitive. I used Waverly Wax to “dirty” them up a bit and give the white wood a grungier, aged finish. If you’ve been around here long, you know that’s much more my style. I love things that feel old, rustic, vintage, and a little imperfect.
I gave the snowmen fabric hats and scarves, painted their carrot noses and faces, added rosy cheeks, and finished them with little bells. I used coordinating fabrics and colors so that even though each snowman is a little different, all three pieces work together as a collection.
That’s one of my favorite things about projects like this. You don’t have to make everything exactly the same. Repeat a few colors, fabrics, or finishes and you can create several pieces that look like they belong together.
I love how these little guys turned out. They have that imperfect, handmade primitive look that I love, and because they’re snowmen instead of strictly Christmas décor, I can enjoy them long after the Christmas decorations come down. They’re simple, sweet, and each one has a little personality of its own.