DIY Reversible Rustic Christmas Star Decor
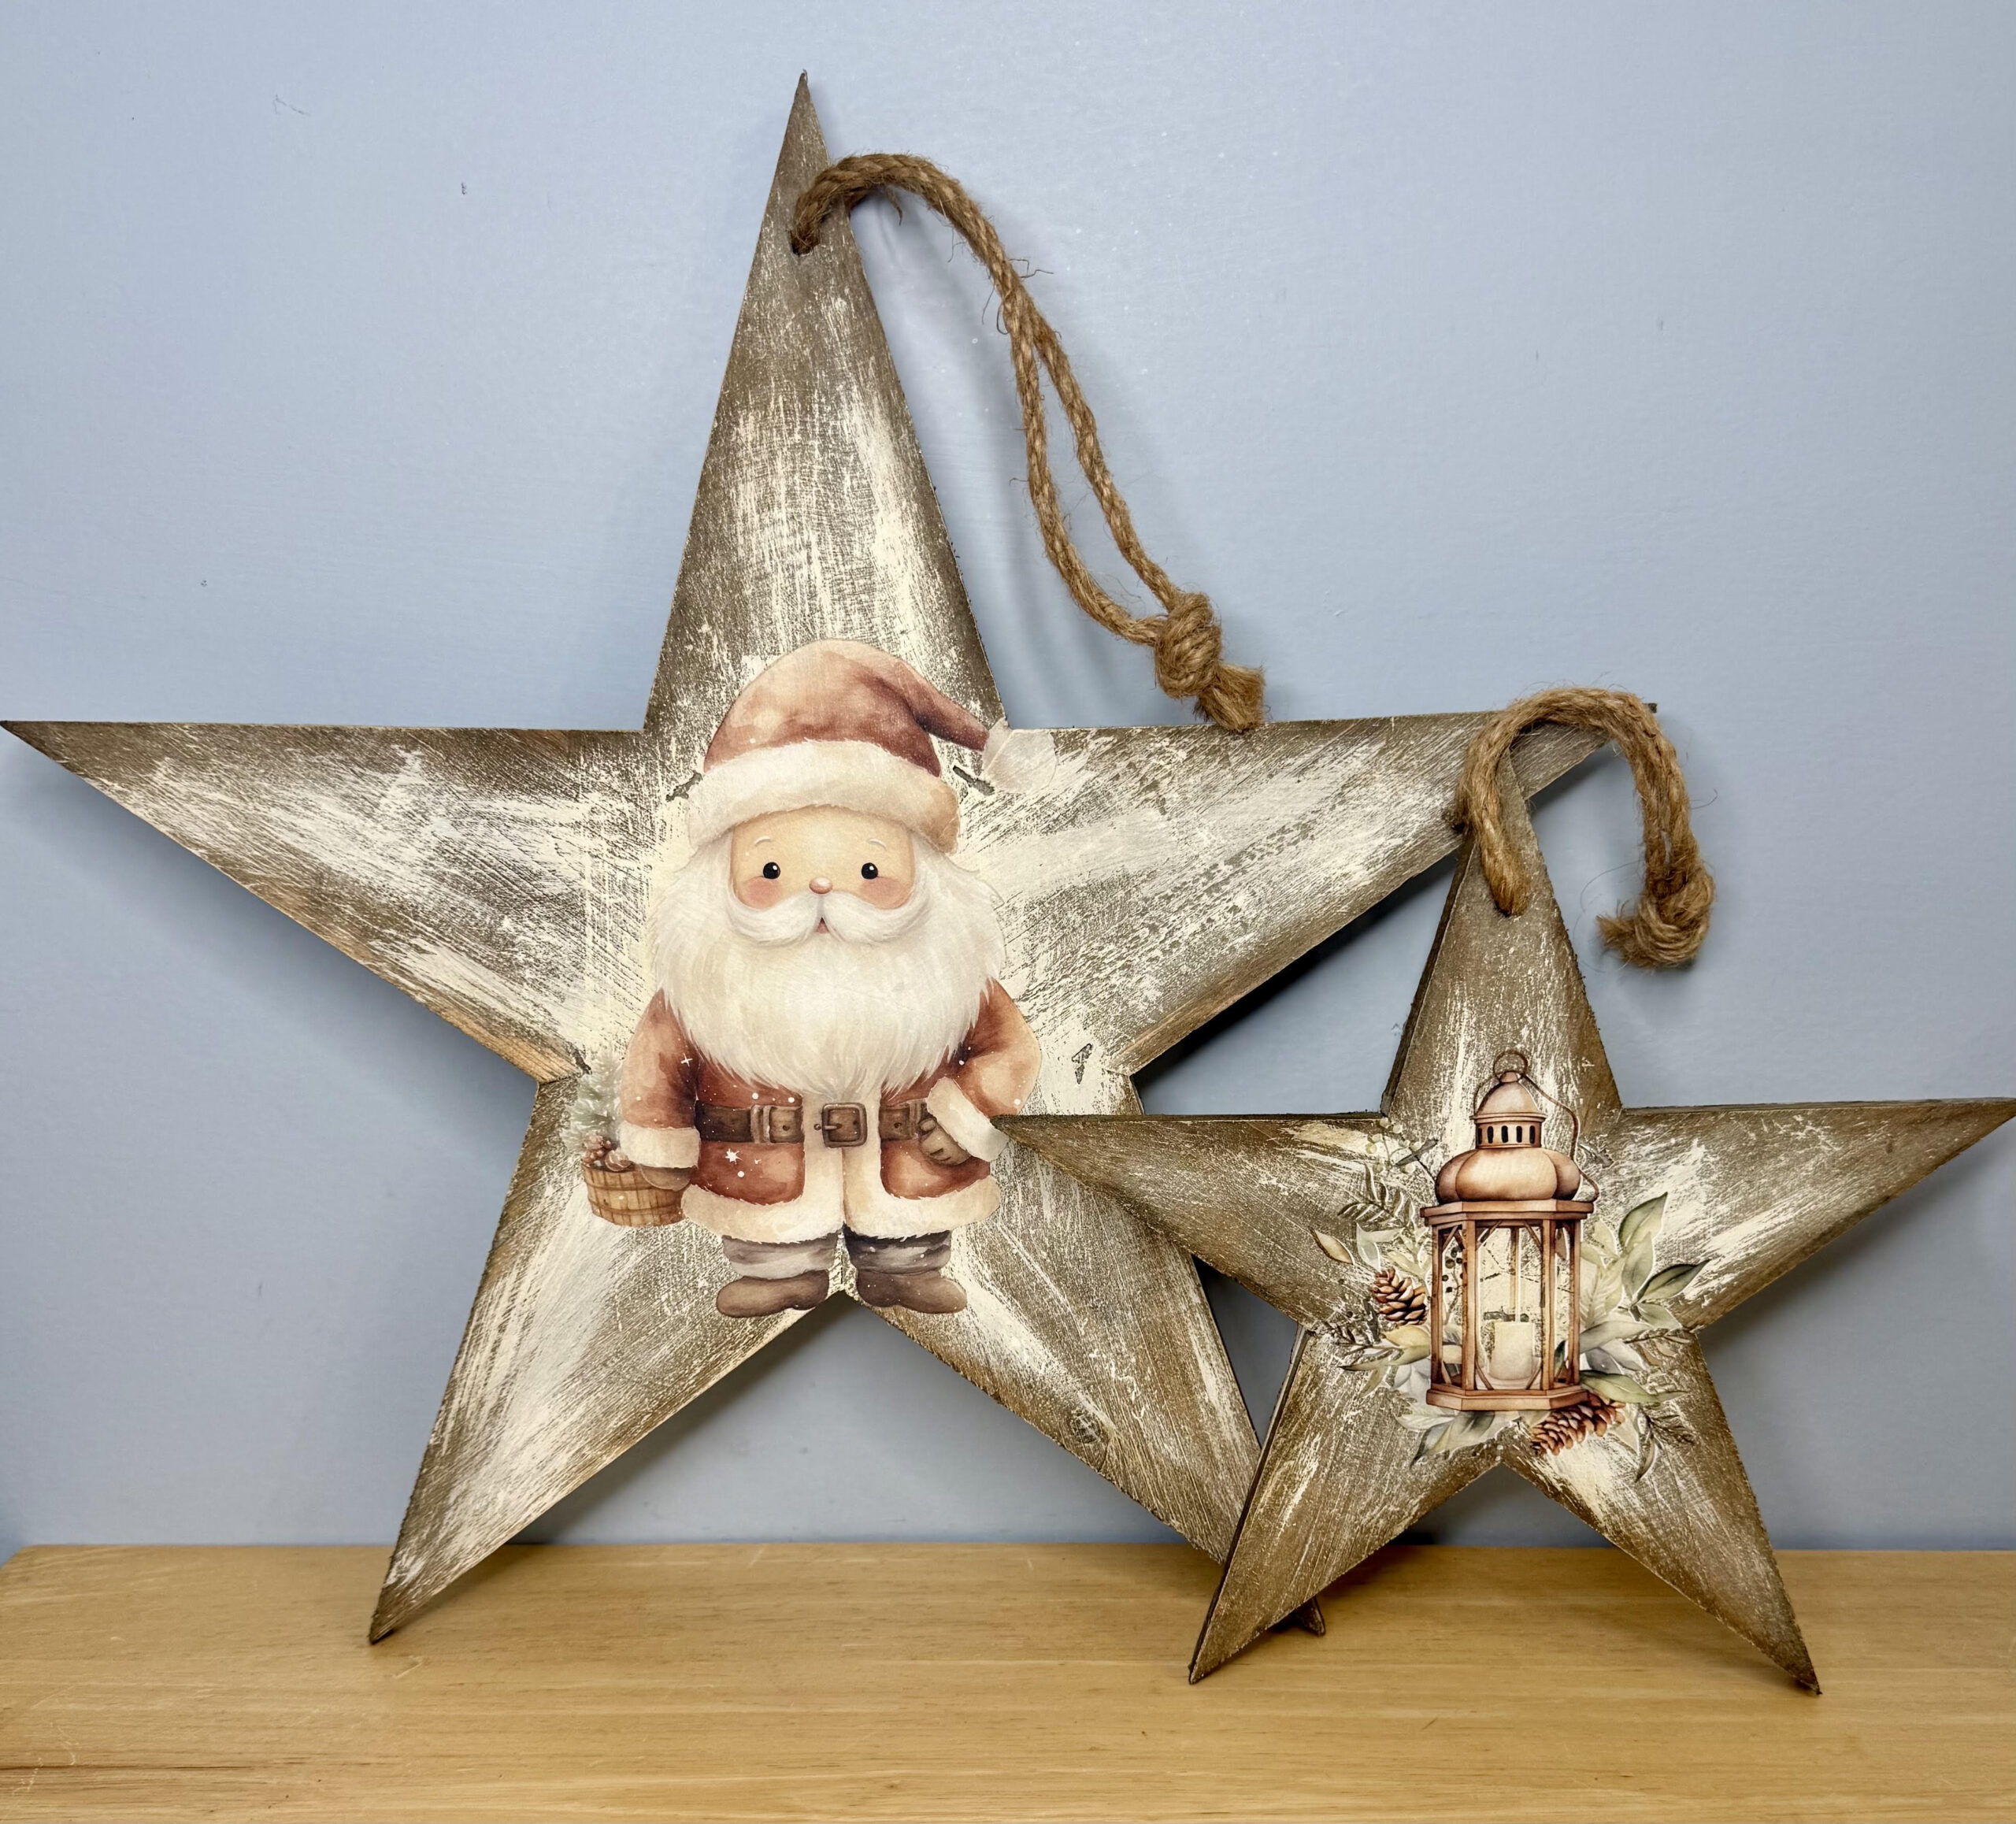
Sometimes the best pieces to create with are the ones that already have a little age and character. I was gifted these two rustic wooden stars, complete with rusty spots, staples, and plenty of imperfections, and I knew they would be perfect for a vintage Christmas project. Instead of trying to make them look new, I decided to embrace all that rustic goodness and create something that looked like it had been around for years.
Even better, I decided to make both stars reversible. I used a combination of Essential Stencil transfers and Christmas printables from my friend Summer at Hammon’s Nest, giving me four different designs from just two wood pieces.
Supplies Used
- Rustic Wood Star Hangers
- Essential Stencil Merry & Sweet Christmas Transfers
- Essential Stencil Timeless Christmas Transfers
- Hammond’s Nest Printable Nest Christmas Printables
- Dixie Belle Magnolia Paint
- Dark/Antique Wax
- Mod Podge
- Regular Printer Paper
- Chip Brush
- Fan Brush
- Essential Stencil Burnishing Tool
- 120-Grit Sanding Sponge
- Water Pen
- Paper Towels
- Heat Tool
- Optional Stickles or Glitter Paint
Creating the Rustic Background
I started with Dixie Belle Magnolia and a chip brush. I added more paint toward the center of each star, where my designs would be placed, and feathered it out toward the edges. I wasn’t looking for full coverage or a perfect paint job. I wanted the original wood and rusty details to remain part of the finished design.
Before adding the transfers, I gave everything a light sanding and made sure the surface was completely clean and dry. Transfers need a surface free of dust, grease, oil, and wax so they’ll adhere properly.
Adding the Christmas Transfers
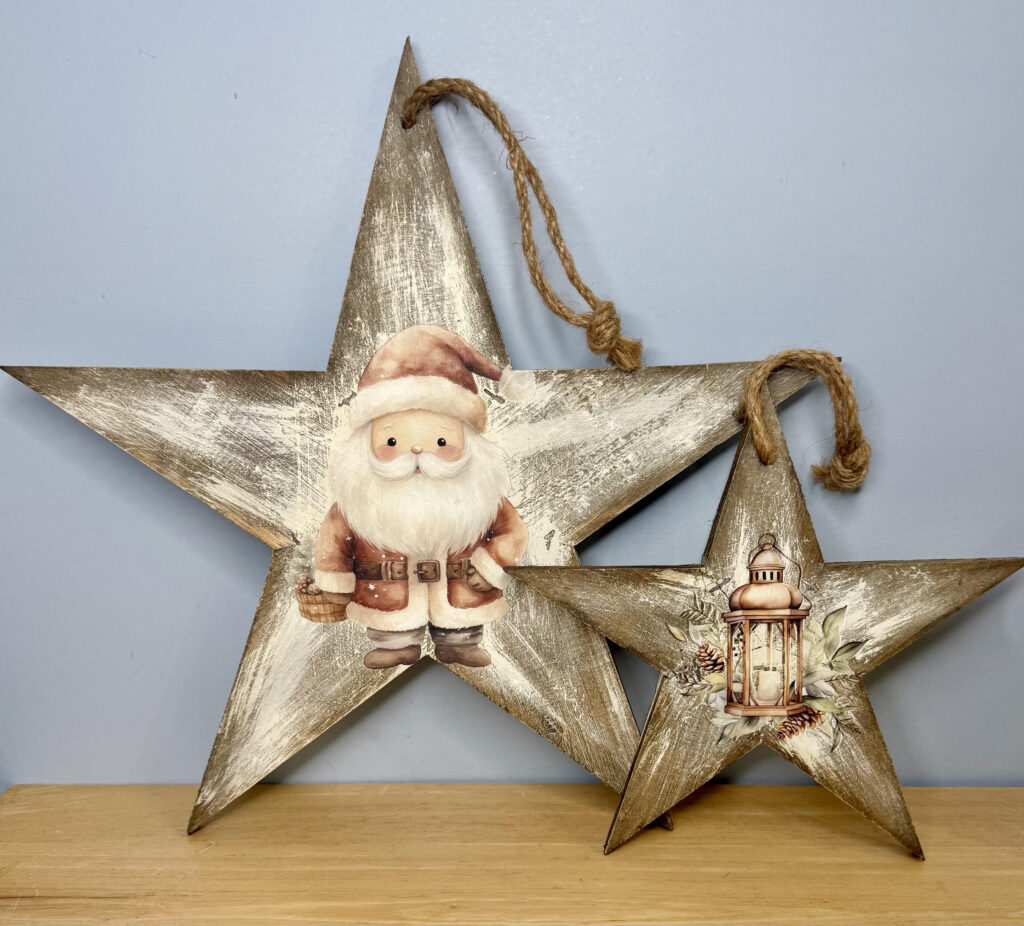
On the larger star, I used the Santa from the Merry & Sweet Christmas transfer set. I positioned him so he filled most of the center, even allowing a little of his pom-pom to wrap onto another section of the wood. I love how the snowy details in his coat work with the soft Magnolia background.
For the smaller star, I chose a vintage-style lantern. I wanted this one to be subtle, almost like the image had always been part of the old wood. It blends right into the rustic background instead of looking too bold or new.
Using Printables on the Reverse Side
Then I turned the stars over and brought in a couple of Christmas printables from Hammon’s Nest.
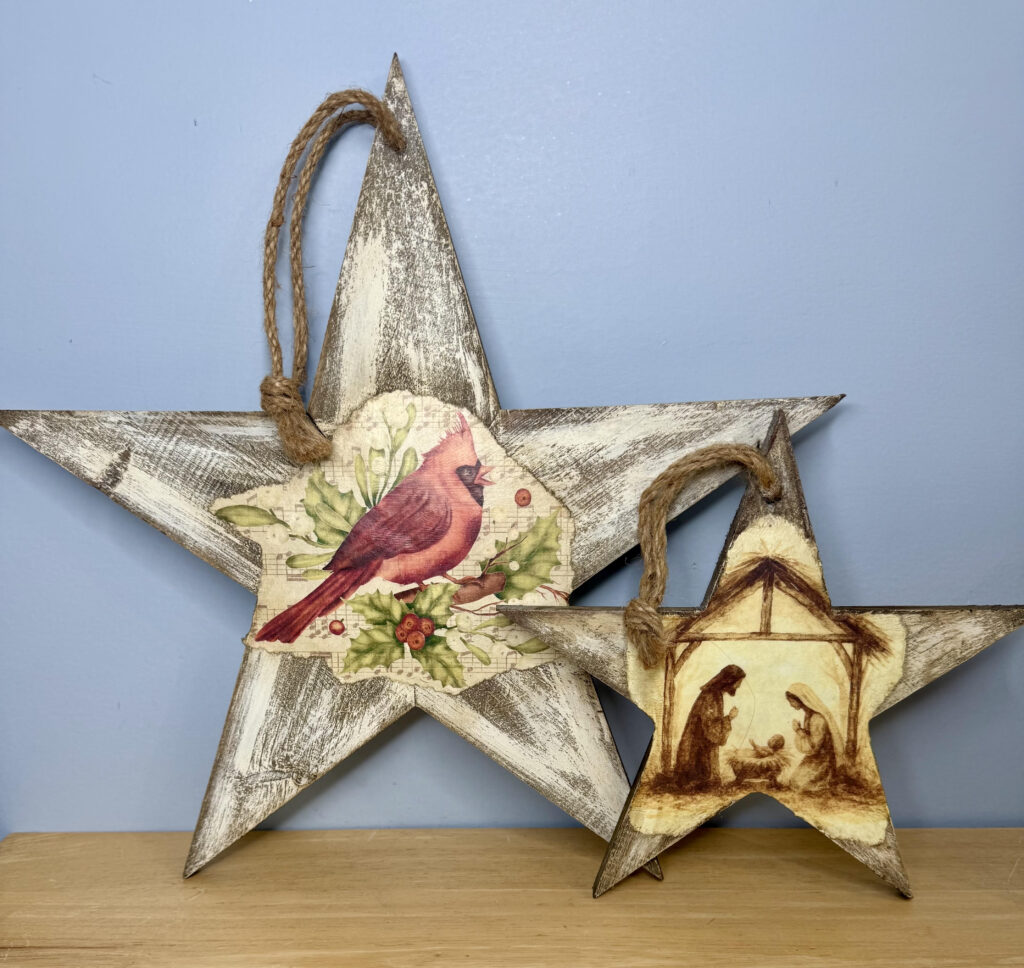
I printed the designs on regular printer paper and resized them to fit my stars. For an older, worn look, I tore around the edges instead of cutting them into perfect shapes. That little detail makes a big difference when you’re trying to create something rustic.
I attached the printables with regular Mod Podge and added another light coat over the top. A few wrinkles don’t bother me at all on a project like this. They actually add to the aged character of the piece.
One of the designs is a beautiful nativity scene. I love that the smaller star has a lantern on one side and the nativity on the other. It’s a simple little reminder of the Light of the World, and I thought those two images belonged together.
Want to get your own printables? Check out the Hammons Nest – Printable Nest Library And save with Code Knot50
Aging Everything With Wax
Once everything was in place, I used dark wax around the edges. I didn’t want a heavy coat, so I offloaded the brush first and slowly built up the color.
Around the paper edges, the wax almost makes the printable look burned or faded into the wood. That’s exactly the effect I was hoping for. I also lightly toned down some of the brighter white areas so the transfers, printables, and original rustic wood all looked like they belonged together.
I thought about adding greenery, bows, extra stars, and even a little metallic finish, but in the end I really liked these without a lot of embellishment. Sometimes knowing when to stop is part of the process too! The original rusty staples and rough wood give these stars plenty of character on their own.
I love that these stars give me two completely different looks depending on which way I turn them. They’re rustic, a little imperfect, and full of vintage Christmas charm—which is exactly what I wanted from them. And because I started with pieces that already had plenty of age and character, those imperfections became part of what makes the finished projects special.