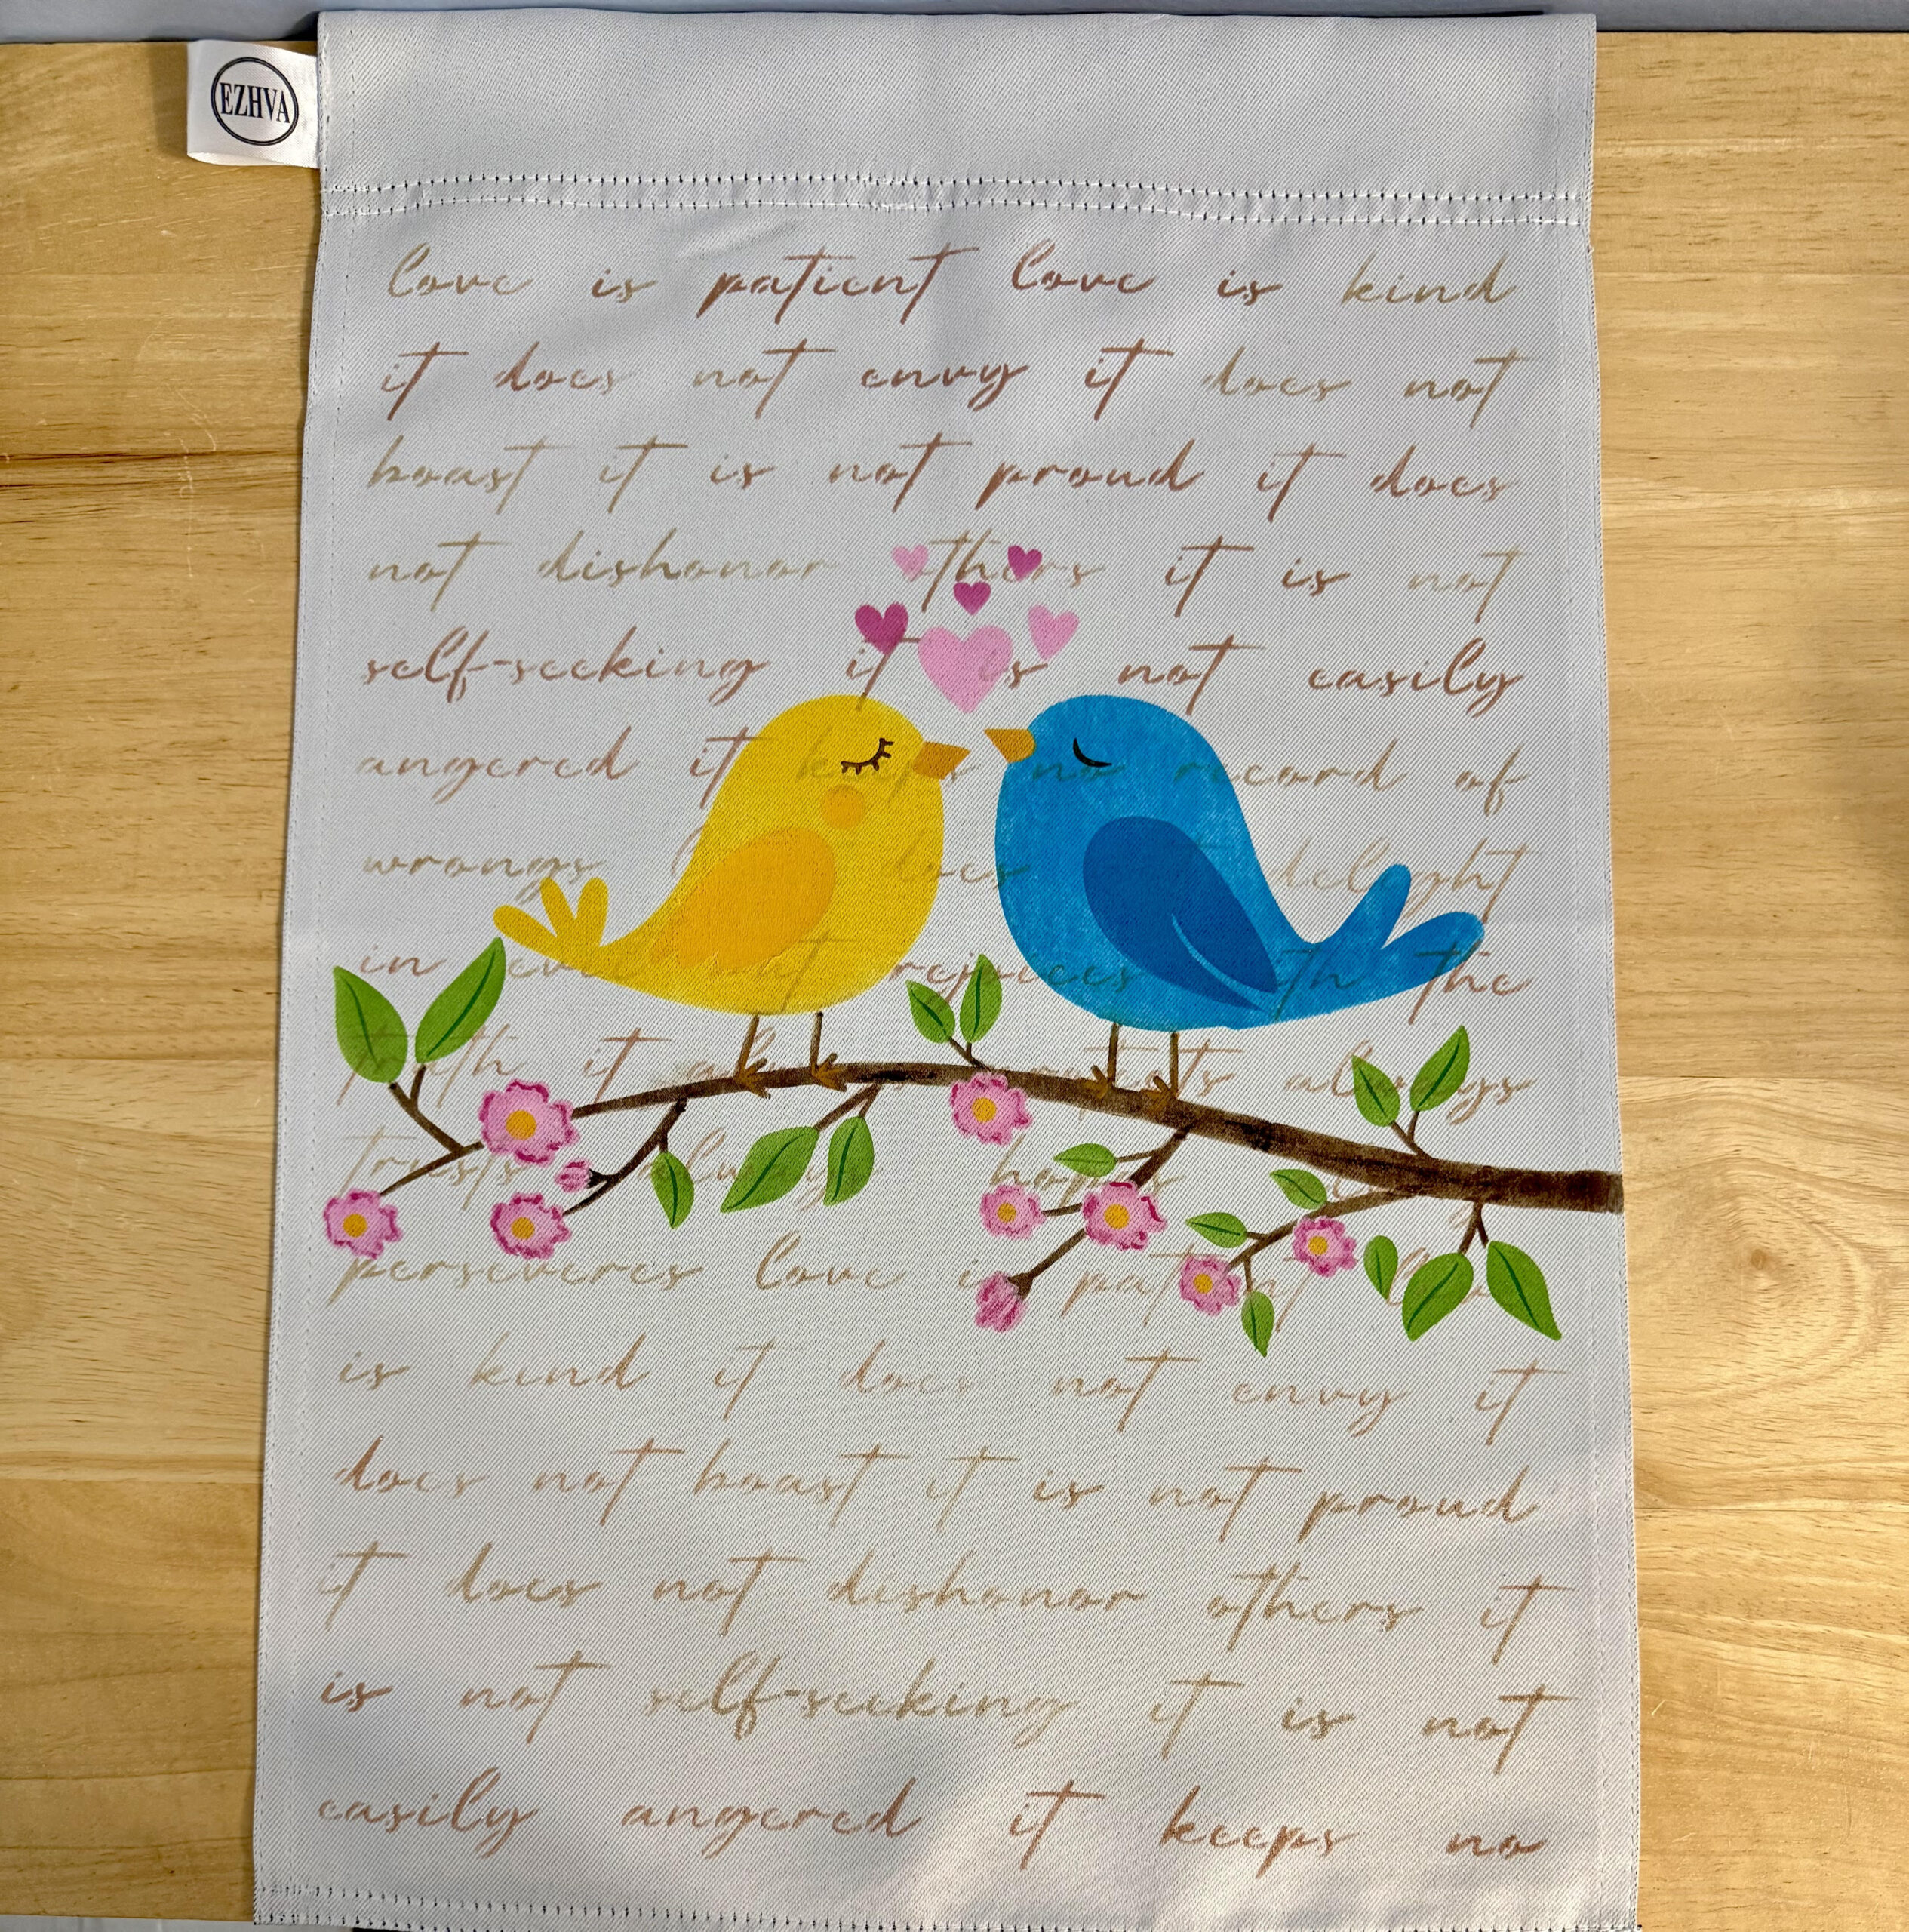
Sweet Love Birds Garden Flag DIY
This project is one of those that just stays with you. Not just because it turned out beautiful… but because there’s a story behind it.
This garden flag was a custom piece, and every part of it—from the script in the background to the little lovebirds sitting together—was chosen with meaning. And those are always my favorite things to create.
What We’re Making
This is a custom garden flag featuring:
- A soft script background
- Two lovebirds sitting on a branch
- Layered stencil details (flowers, leaves, wings, and hearts)
- A gentle, spring color palette
Supplies Used

Here’s what I worked with:
- Garden flag (Amazon blank)
- Script stencil (background)
- Lovebirds layered stencil set
- Acrylic paint (metallics + soft colors)
- Stencil brushes (various sizes)
- Paper towels / coffee filters (for offloading paint)
- Heat source (iron or dryer to set paint)
If you click over to Essential Stencil to grab the Easter Stencil, you can use my code WK21 at checkout.
Here are the stencils we used today:
Spring 2026 Collection – https://bit.ly/4asB7Ym
Love is Patient – https://bit.ly/4cimDM4
Love Birds – https://bit.ly/4aNCgtP
Create the Background
For the background, I used a script stencil and two metallic colors: Champagne gold and Rose gold
Instead of making it uniform, I lightly blended the two so it feels soft and a little imperfect. That’s the key—this is meant to be a background, not the main focus.
Tip:
Always offload your paint before going onto fabric. Too much paint = bleed, and fabric doesn’t forgive that easily.
Add the Lovebirds
Next came the focal point—the lovebirds. This is a layered stencil, which makes everything so much easier because each layer builds on the last.
- Start with the branch (brown tones)
- Add the base color for each bird
- Then layer in wings, details, and features
For this piece, the girl bird is a soft yellow and the boy bird is a gentle blue. Even though the colors seem bright at first, they soften beautifully against the background.
Layer the Details
This is where everything really comes to life. Add leaves in soft greens and layer blossoms with light pink + deeper pink edges. Fill in small details like beaks and accents
Take your time here—these little touches make a big difference. You can even go back in with a small brush to extend branches, add tiny highlights, and define areas that need just a bit more depth.
Don’t Forget the Hearts
This part almost got missed… and I’m so glad it didn’t. The small hearts above the birds tie everything together. Using light and darker pink keeps it balanced with the flowers and adds just the right finishing touch.
Heat Set the Paint
Once everything is dry, you’ll want to set the paint so it holds up outdoors. You can place a towel or parchment paper over the design and iron it or toss it in the dryer to heat set That’s all it takes to make it durable and ready to use.
The Finished Piece
This one… it just turned out so special. The soft shimmer of the background, the sweet little birds, the blossoms—it all comes together in a way that feels peaceful and meaningful. And the best part? Even with all that layering, the back of the flag stays clean with no bleed-through.

A Little Encouragement
Sometimes we worry about getting everything “just right.” But creativity doesn’t work that way. You try. You layer. You adjust. And somewhere along the way… it becomes something beautiful. If you’ve never made a garden flag before, this is such a good place to start. You can customize it for your home, a gift and a special memory
And truly make it your own.